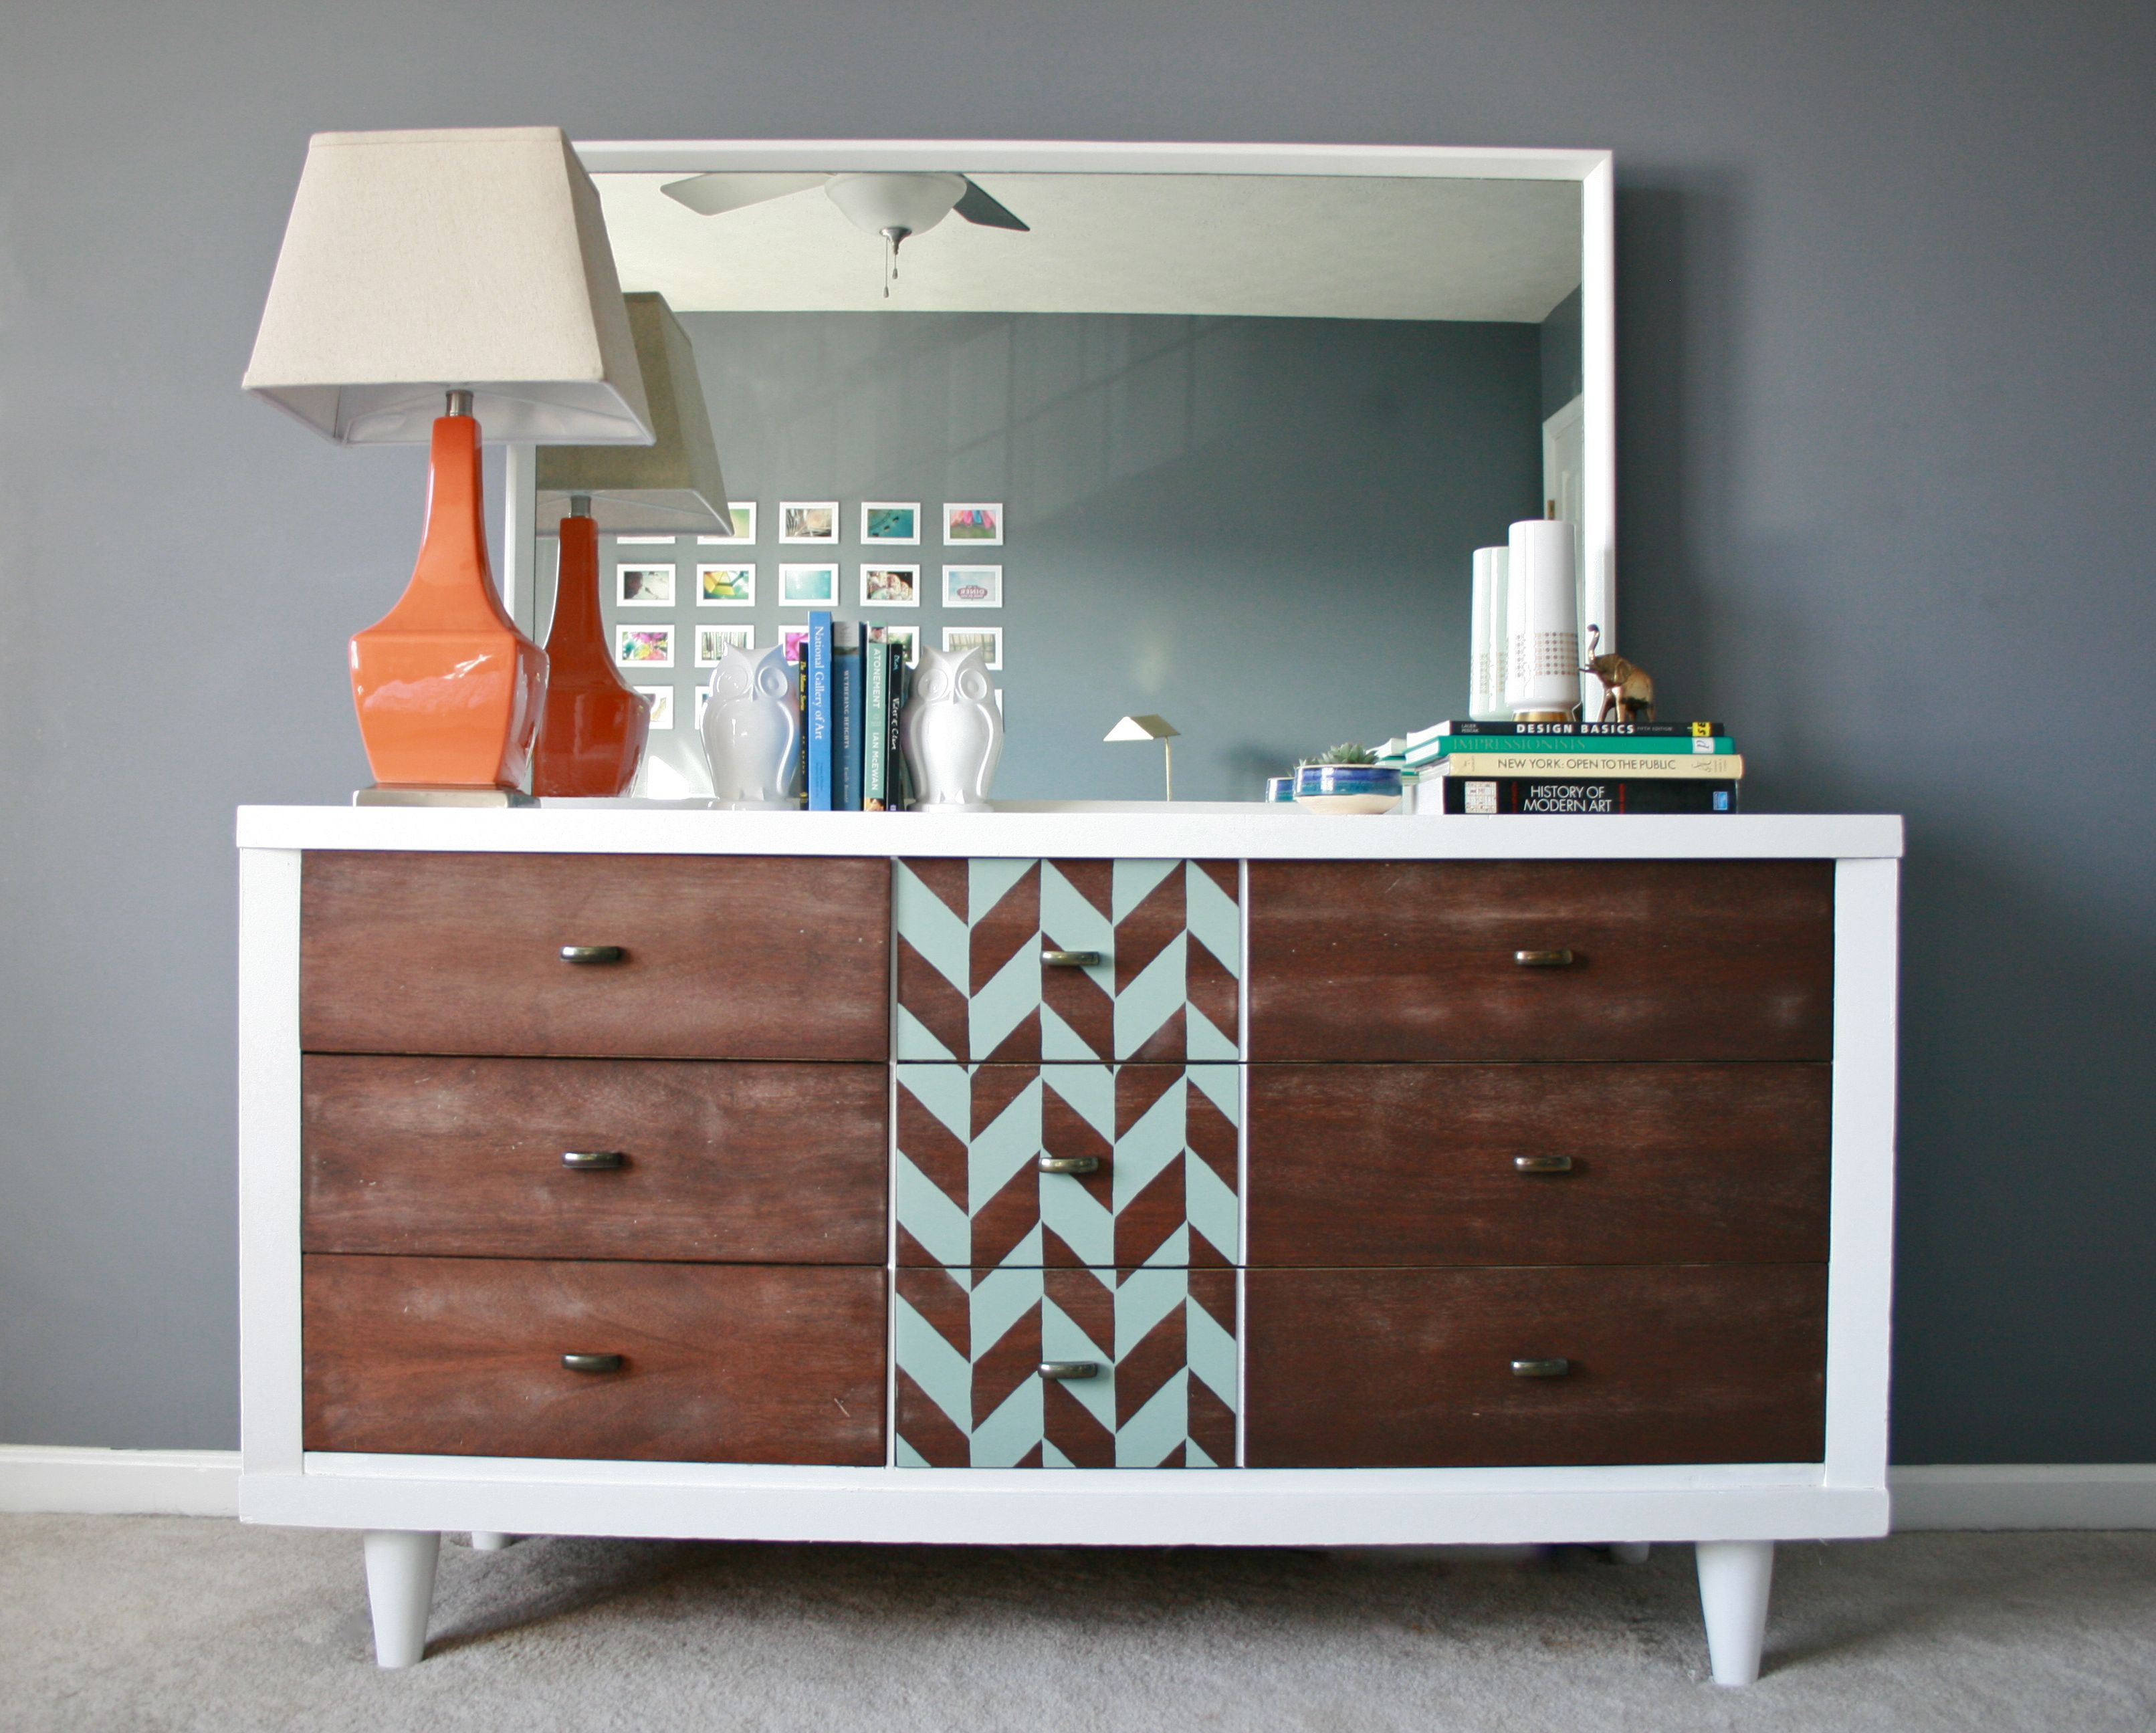
After a month of behind the scenes coordination, a few weekend’s-worth of finishing touches and one sneaky sneak peek, I am finally ready to share one of my greatest triumphs as a DIY-er. I’ve seen many a creative personality tackle a full furniture makeover, but I had always been a bit scared to try it myself. However, I am happy to report that it’s not NEARLY as hard as I had expected, and the finished product is well worth the struggle…
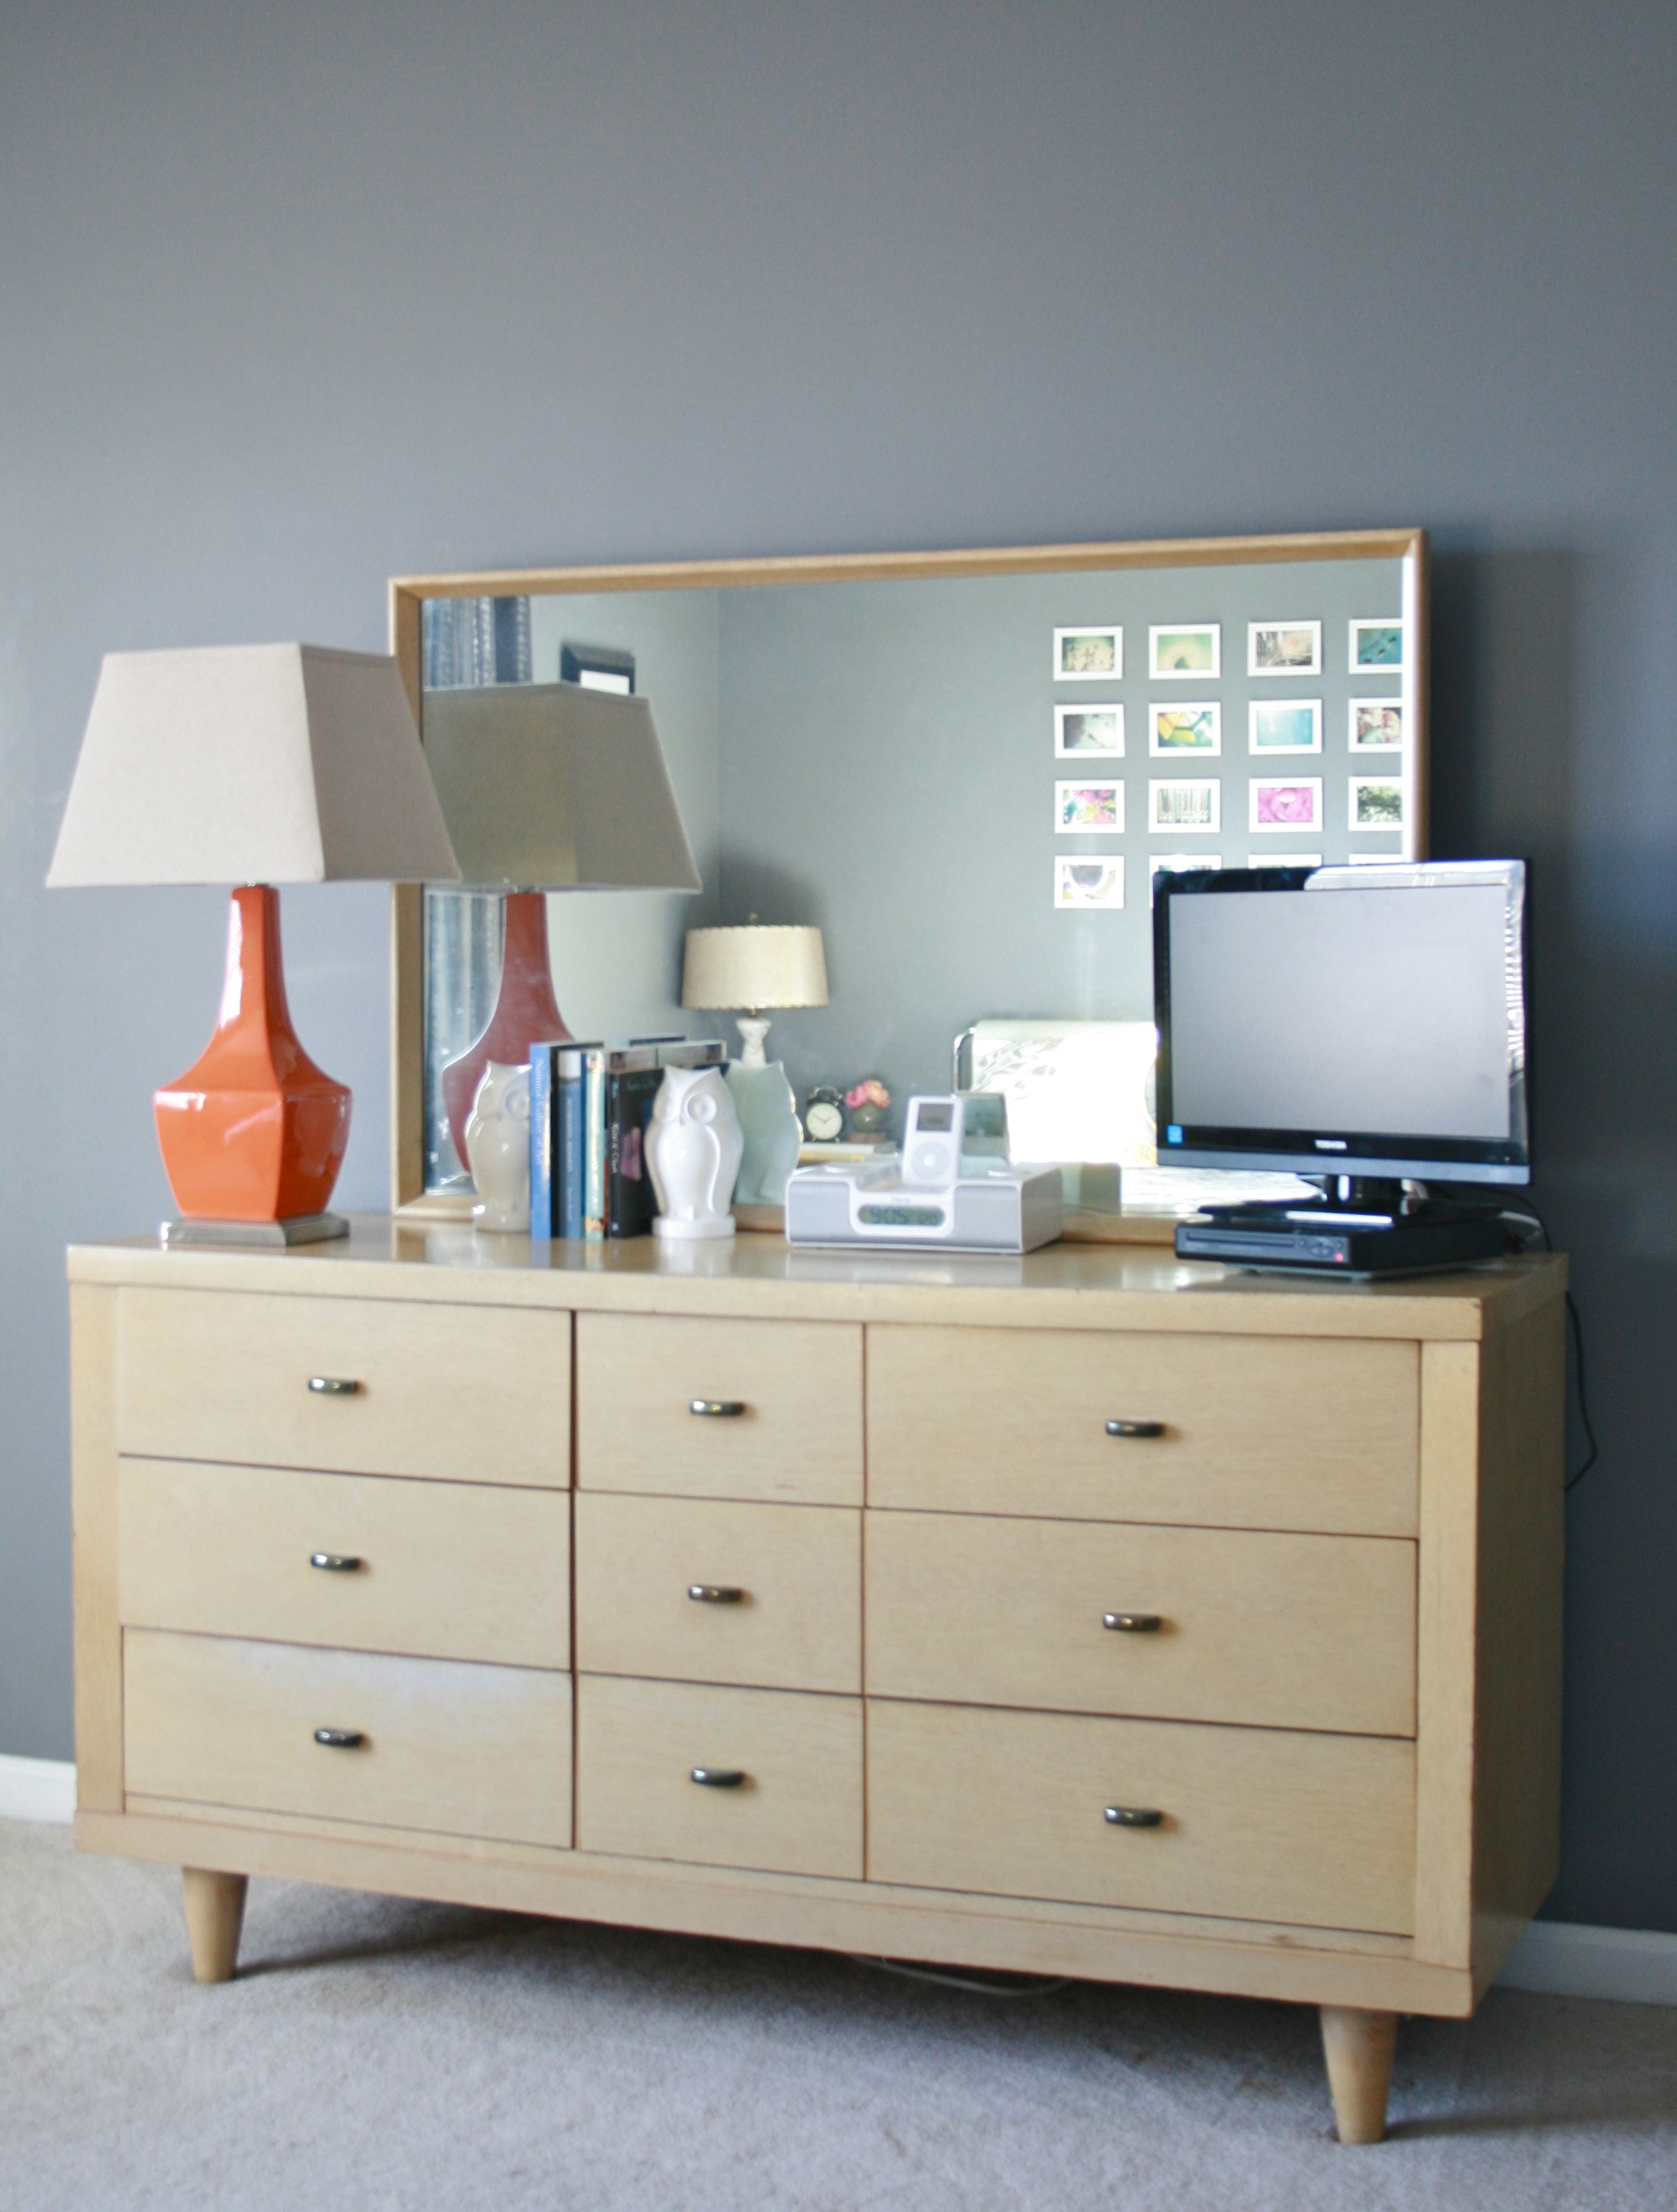
But look at me jumping ahead of myself…Some of you may remember what this thrifted mid-century mod dresser looked like before. It was one of the very first pieces that John and I bought together when I moved in a year and a half ago. Although we loved the lines, we were a little less thrilled with the finish – Light wood just isn’t our jam, at least not in such a large scale piece like this one. Despite the rough spot on that one drawer though, the piece was in fairly decent shape and only cost us $150, huge mirror included.
With no real motivation or direction on how to change it, we simply lived with it as is. But fast forward almost 2 years later and something wonderful happened to change the course of fate. I was approached by one of my all time favorite companies – Royal Design Studio. With their kind encouragement and the offer to try one of their high quality stencils, my mind immediately shifted to our tired old dresser. Once the wheels started turning and after involving John, we devised a plan that would transform this piece of furniture into a treasure that we would be proud to show off.
Before I get too deep into the prep work, allow me to explain our thought process. I have been captivated by the look of mid-century pieces wrapped in a painted white exterior – A few looks to demonstrate this can be found here, here and here, but basically the top, sides and edges of the piece are painted white, while the drawer fronts are left as stained wood. But to make this look really OURS, we decided that the Royal Design Studio stencil would perfectly provide a pop of character if we used it down the front middle of the drawers.
Oh, and the MOST important decision we had to make was which stencil to order! Since we had already happily used their Endless Circles Lattice Moroccan Stencil in our living room, I knew we needed to go with something more linear and something a bit sharper for contrast throughout the house. So this time, I went with the medium Herringbone Pattern Wall Stencil from the Allover Modern Stencils Collection (pictured above).
The first step in the process was to carry the dresser down two flights of stairs to the garage where we could sand and paint to our heart’s content (and to the content of our nice furniture and carpet upstairs). John helped me out by sanding all of the old stain and varnish from the outside of the piece, while I got to work on the painting and staining portions. We used Kilz 2 Latex Primer to make sure that everything was nice and sealed, and then “Ultra White” Valspar kitchen and bath paint on top. As for the new stain on the drawers, we used Minwax “Dark Walnut” for its rich finished color.
After giving the exterior and edges of the dresser one coat of primer and two coats of the ultra white, we let it dry indoors for a good two days. The same went for the drawer fronts, which got about four coats of the stain to make them as dark and saturated as possible.
Once everything was cured, we brought it back up to the bedroom where I laid out the drawers face up on the ground, ready for stenciling. I simply taped off the edges of the outlying drawers, used more masking tape to hold the stencil in place and then grabbed my paint and roller. For those curious about the color, I ended up using leftover paint from our living room (“Halcyon Green,” by Sherwin Williams). It’s such a pretty shade of dark mint and seemed like a better choice then true icy mint – I thought the extra brightness of light mint might be a bit TOO much contrast in the end.
With the color chosen, I dipped my small 4-inch roller in the paint tray, rolled it on a piece of paper towel to remove the excess and then very gently rolled a light amount of color over the stencil. I simply repeated the process until the color was saturated enough, and then slowly removed the tape and stencil to reveal nice, crisp edges. After letting the first section dry, I gingerly laid the stencil down once more to cover the bottom drawer, overlapping a few shapes from the top to make sure my pattern was lined up perfectly.
Once the second half was finished, I removed my stencil and used a tiny art brush to clean up any of the edges that came out a little uneven (I pushed a little too hard on the roller in my excitement). When stenciling, patience truly is the best virtue.
After allowing the stenciled portions to dry completely and putting the original hardware back in place, we were finished.
I think the stencil was the final key in making this piece special. That hit of pattern is so eye-catching and really sets the dresser apart from any other piece in our home. Plus, just the satisfaction that John and I were able to work on it together makes it even more important.
Oh those colors…The dark brown stain, the white and mint – This is one of my favorite combinations of color and works well against our deep gray walls. As for the styling on top, I tucked our television in a corner (to be hung in a more unobtrusive spot on the wall later on) and replaced it with a stack of art books, a couple of little thrifted pieces (like the brass elephant and succulent dish) and finished everything off with my brand new-to-me mid-century vase from Etsy. The bright orange lamp and white bookends and books help to balance out and finish off the other side.
But, as you know per DG-DIY policy, this makeover isn’t the end of the story. I’m pleased to announce that Royal Design Studio is offering up a SECOND stencil to one of my lucky readers!! If you have been itching to tackle your own furniture makeover (or maybe a painted tray, feature wall or patterned backsplash), check back in this time next week to enter your name in the drawing. Be thinking about what you’d do if YOU won!
P.S. I’m linking this project up over on East Coast Creative – If you love how it turned out, feel free to click over and show it some love (you just need to click on my thumbnail – #175 – to give it a view)!! I can’t thank EVERYONE enough for the support…


