*Today’s post was made possible by Perkins Hollow Retreat, and features content created during a gifted stay. All opinions are my own.
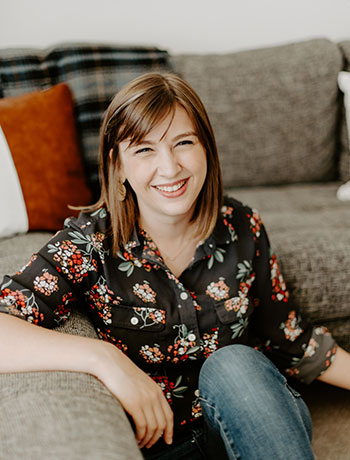
I don’t really know why folks make such a big deal about turning the big “4-0.” I reached the milestone this past April, and have actually loved the shift into this new decade. I still feel like me, and am looking forward to heading into this next season. It feels like my forties will be quieter—more settled, in a way. Maybe I’m able to say that because I’m childfree and I’m allowed to be a little more selfish with my time because of that choice, but the truth is that I’m feeling extra glad to fully embrace the sense of peace that I’ve afforded myself.
Speaking of peace, rather than a big blowout party or trip over the border to celebrate my birthday, I opted for a weekend away with just me and my little sister at Perkins Hollow Retreat in nearby Nelson County. My sister led the planning on this adventure, giving me two options for our getaway: a “staycation” an easy half hour away from home, or a city trip about two hours away. I’m sure you’re not surprised to hear that I ultimately chose the “staycation,” homebody that I am, and I’m so grateful that I made that choice because Perkins Hollow was perfect in every single way. It was the best weekend I’ve had in years.
We booked our weekend at The Cottage on Perkins Hollow’s property. This 1-room studio-style space had everything we needed and more: a screened-in porch that we used over and over again for yoga and conversation, a fully equipped fire pit area, outdoor bath and shower, full-size kitchen, luxurious indoor bathroom with a rain shower head, and quite possibly the most comfortable king size bed we’d ever slept on. I’m not exaggerating. This cottage was beyond cozy, so much so that we found ourselves making notes of who made the bed pillows, kitchen ceramics, and robes so that we could upgrade our own collections at home.
And did I mention that there’s a resident dog on the property?! River the black lab was a very welcome guest during our hangout time on the front porch. The first evening at the Cottage was spent unpacking and snapping all of the photos that you see in today’s blog post, then we immediately got into comfy clothes, poured some wine, and enjoyed a big storm that rolled through the area from our respective swivel chairs on the screened-in porch, River snoozing away on the floor beside us.
The following day, I got up early and spent a little time on the porch by myself with my book watching the morning light stream in through the screens, and then I made myself breakfast before waking my sleepy little sister up so that we could get the day started.
We spent our Saturday in downtown Charlottesville, which was just about a 40-minute drive away. We treated ourselves to some specialty stationary and pens from Rock Paper Scissors, perused handmade treasures at Cville Arts, shopped secondhand clothing at Darling x Dashing and Arsenic & Old Lace, then got lunch at Zocalo.
The one special thing I wanted to do for my 40th was get a nose piercing (my version of a “midlife crisis,” I guess, except a much more thrilling and joy-filled version!), so we headed over to ACME Tattoo after lunch to cross off this bucket list item. I only have a couple of traditional ear piercings, so getting something a little edgier was such an adrenaline rush. My sister wasn’t planning on getting anything herself, but ended up with another piercing in her ear to mark the occasion. I’m now officially addicted to piercings, and will definitely be getting more from our girl, Riess Ferrebee. Thank goodness my career is shifting toward the full-time art scene, where things like tattoos and piercings are more the norm!
After getting back home from our Cville excursion, we made ourselves a massive pot of caramelized fennel pasta, then ate on the cozy in-room leather couch while listening to throwback music from high school and college from a playlist that my sister had made the week leading up to our trip. A long soak in the outdoor tub in our bathing suits was the dreamiest way to end our one full day of the trip. River wandered over to play guard dog for us, and we chatted about movies and music with the evening bugs buzzing way up high in the trees above us.
As for the following day, we were sad to leave Perkins Hollow behind, but we spent our ride back home talking about ways to get back to the cottage along with our family. Let’s just say that plans are being hatched! Before getting all the way home, she and I ate breakfast at Belties in Nellysford, then we went to a sound bath that we had booked ahead of time at Afton Mountain Vineyards. It was glorious and such a relaxing way to finish off the trip of a/my lifetime.
I genuinely couldn’t recommend Perkins Hollow more if you’re looking for a quiet mountainside escape from it all. I would go again in a heartbeat. Everything was so impeccably decorated and the little details were all so clearly considered well ahead of time. I love its proximity to Charlottesville shopping and dining, too, as well as more rural destinations like the wineries all along the Nelson 151 Brew Trail and Glass Hollow Gallery in Afton. Comment or message me if you have any questions, and, before I go, I want to say a big “Thank you!” to the team at Perkins Hollow Retreat for hosting us and, of course, to my sister for planning the loveliest 40th birthday celebration that a quiet, homebody-leaning girl like me could ask for…
.jpg)
.jpg)
.jpg)
.jpg)
.jpg)
.jpg)
.jpg)
.jpg)
.jpg)
.jpg)
.jpg)
.jpg)
.jpg)
.jpg)
.jpg)
.jpg)
.jpg)
.jpg)
.jpg)
.jpg)
.jpg)
.jpg)
.jpg)
.jpg)
.jpg)
.jpg)
.jpg)
.jpg)
.jpg)
.jpg)
.jpg)
.jpg)
.jpg)
.jpg)
.jpg)
.jpg)